
Hey there! Allow me to introduce myself. I’m Sheida, one of the co-founders of Flowjin, and I’m thrilled to be here with you today. In this blog post, I’m going to walk you through the world of Flowjin and show you exactly how to use it to effortlessly generate clips from your audio or video podcast. Together, we’ll quickly explore a step-by-step process to use the product. And, to top it all off, I’ll be sharing some insider tips to help you make the most of the outputs that Flowjin has to offer. Let’s go!
Overview of the Steps
Let’s start with an overview of the steps involved in using Flowjin to generate clips from your audio or video content:
1. Sign up for an account on Flowjin
Visit our website and create an account to get started.
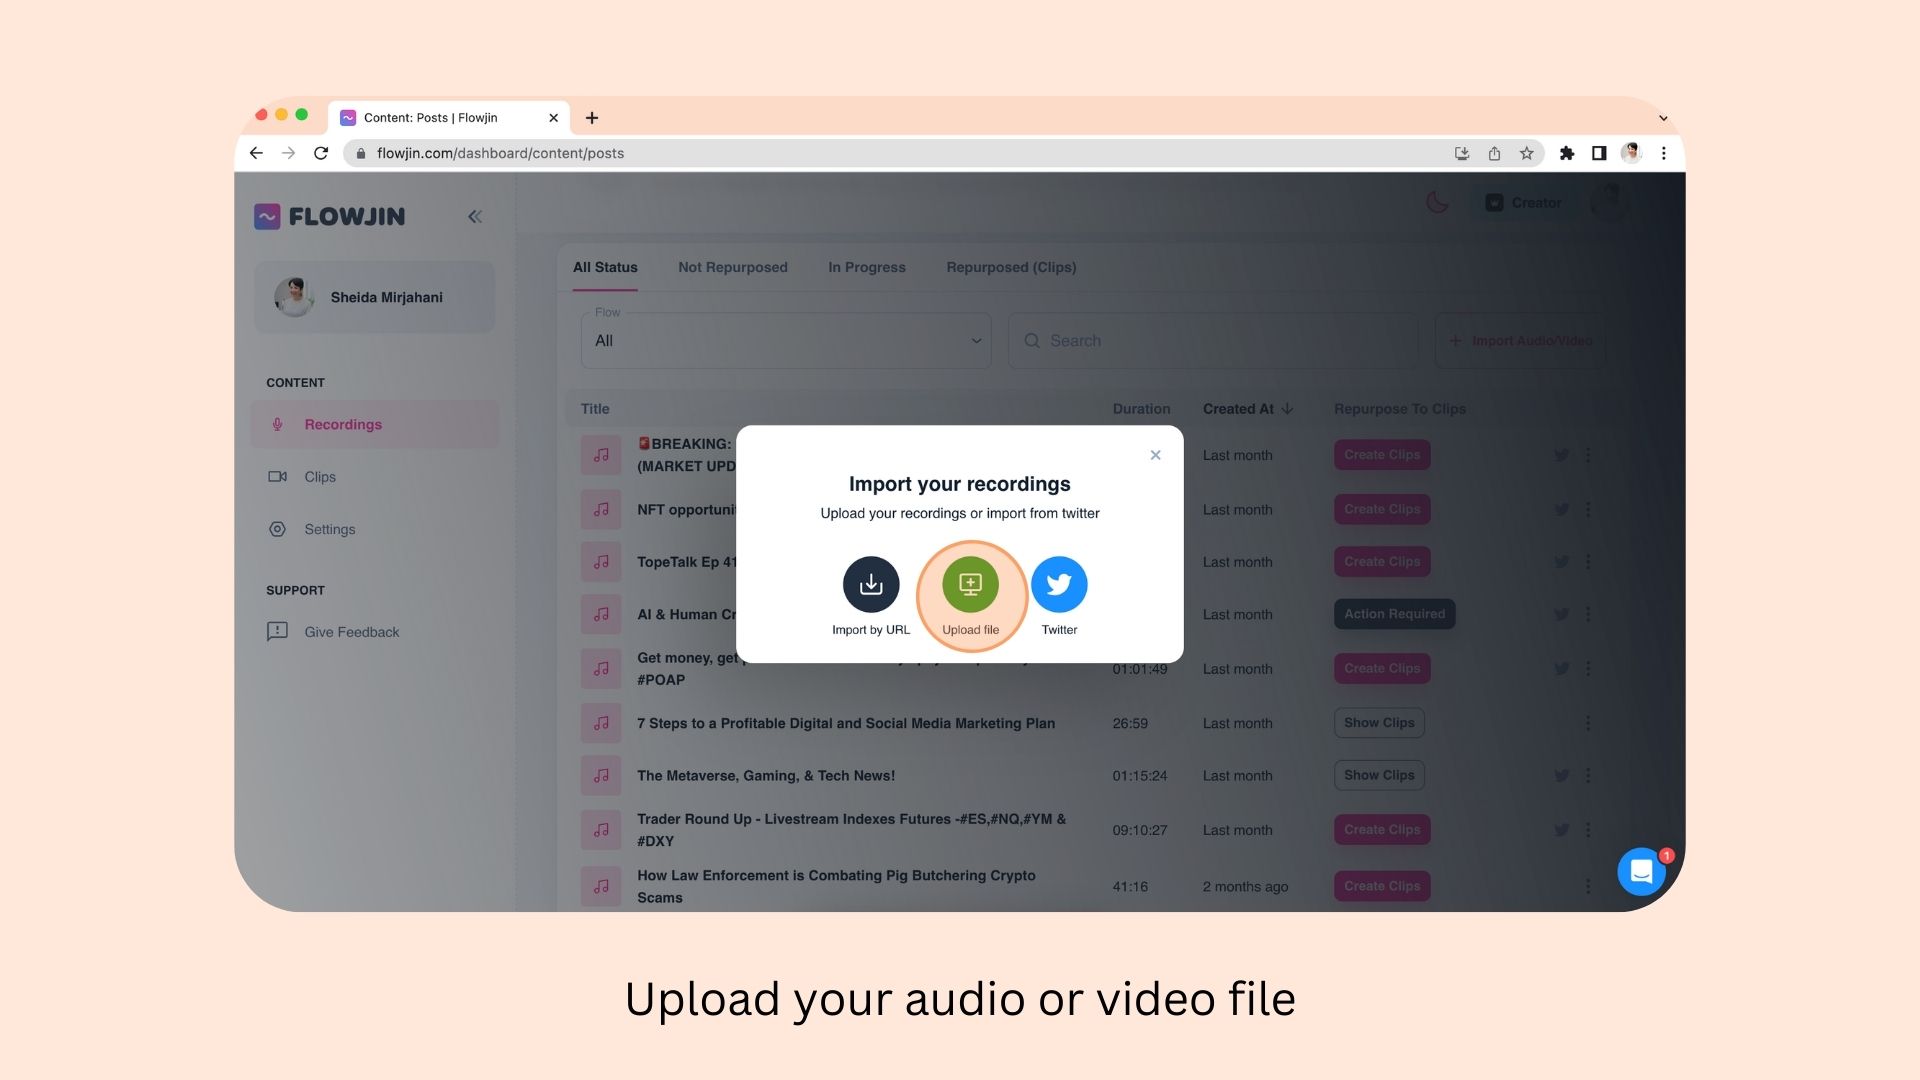
2. Import your audio or video file
Head to the dashboard and click on the “import audio or video” button. Flowjin supports all formats for audio and video files.
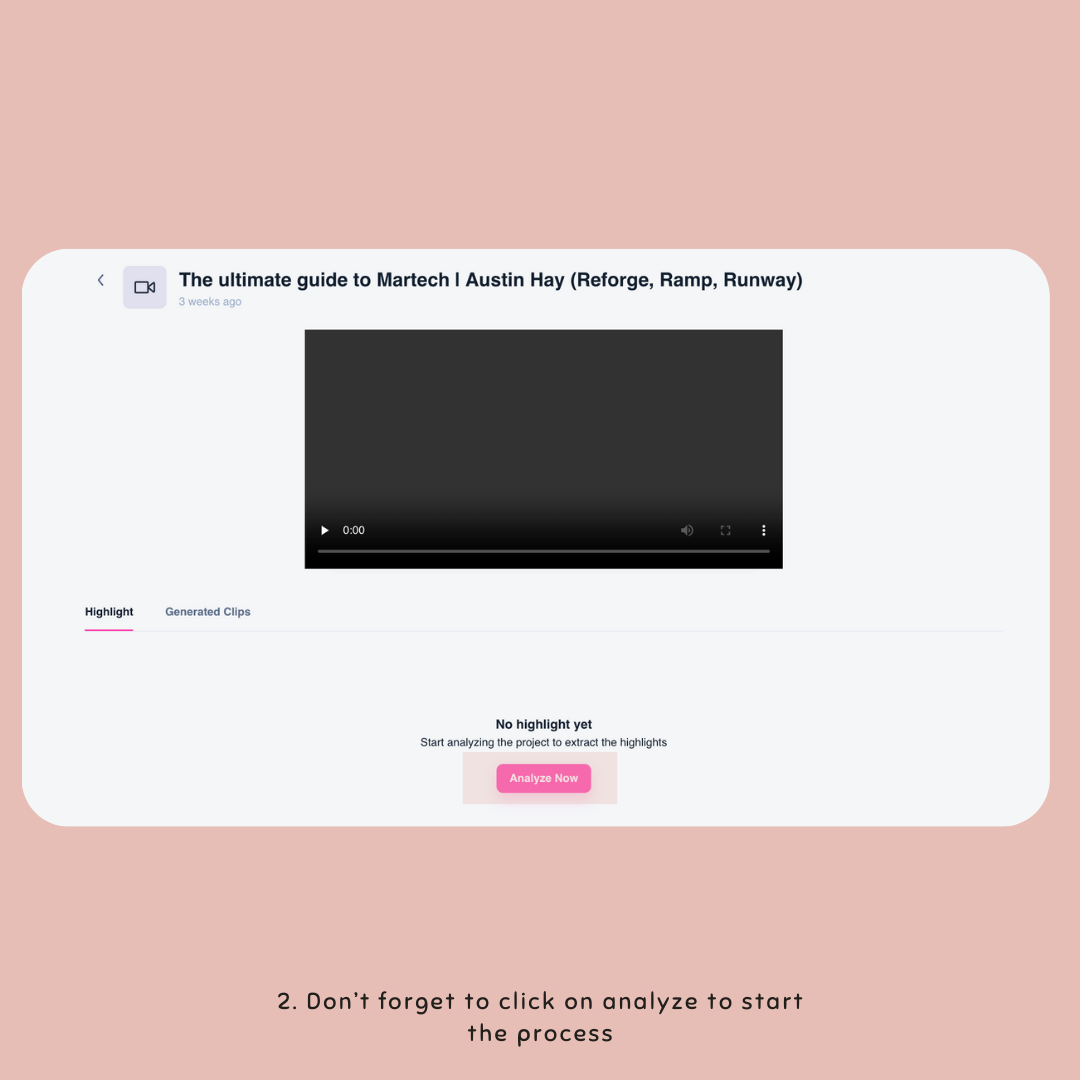
3. Request for Flowjin to analyze your file
This step takes less than 5 minutes. During it, the AI analyzes your content to find the best moments from your content and lets you customize & export later.
Please first click on the “analyze” button next to your uploaded content, then click on the “analyze” button again on the next page.
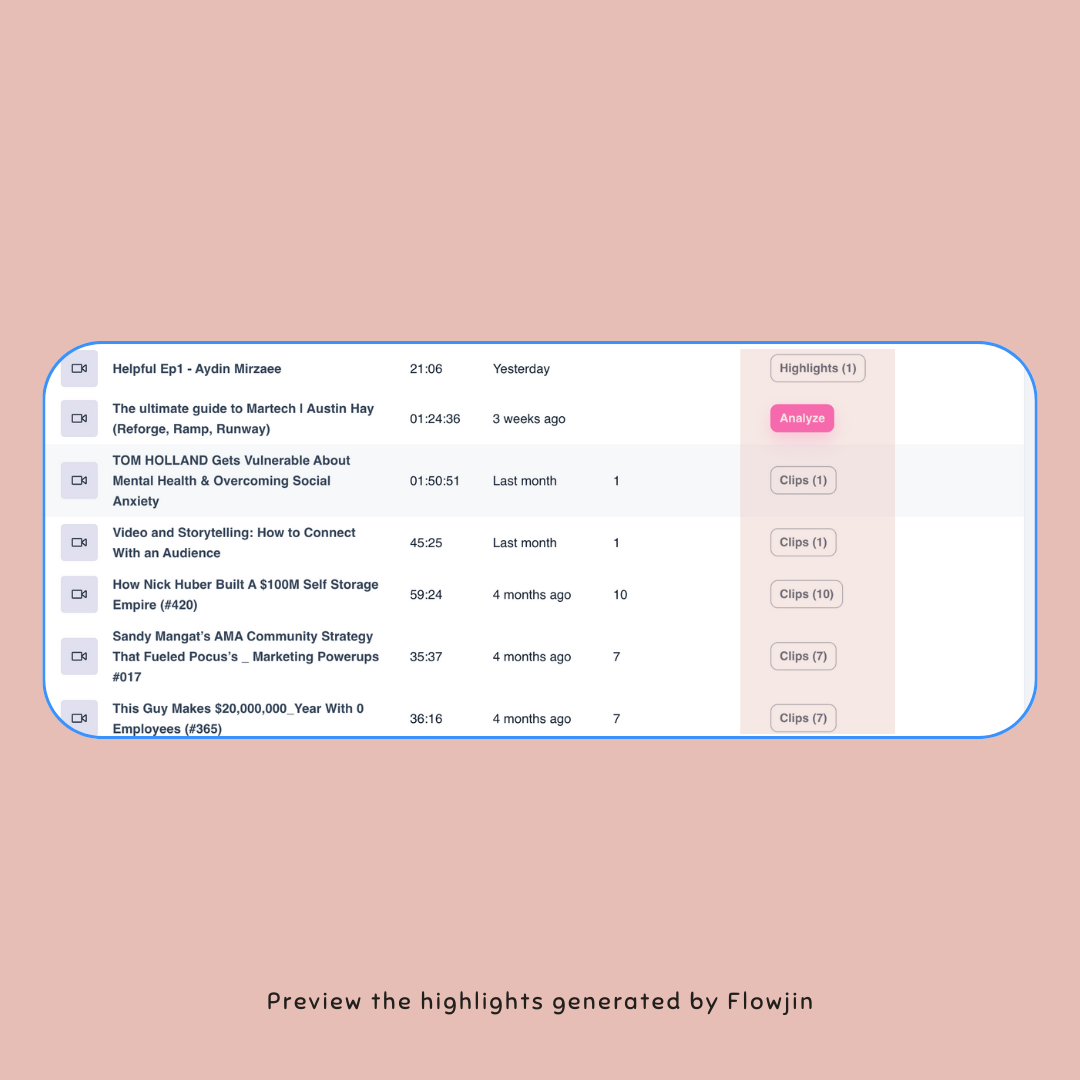
4. Preview the highlights
After the analysis is finished (you’ll get notified by email when it’s done, you can also keep your tab open), you will see that instead of the “analyze” button, now you’re seeing “highlights” with a number next to it. It shows how many highlights it has detected.
The number of highlights depends on the length of your content and how much the information in the content can be devided into sections. For example, if the structure of your content is in question and answer, the AI understands each Q&A as a section and thus a highlight. But if it’s a continuous talk between two people where there is less context switching, the AI might find less highlights.

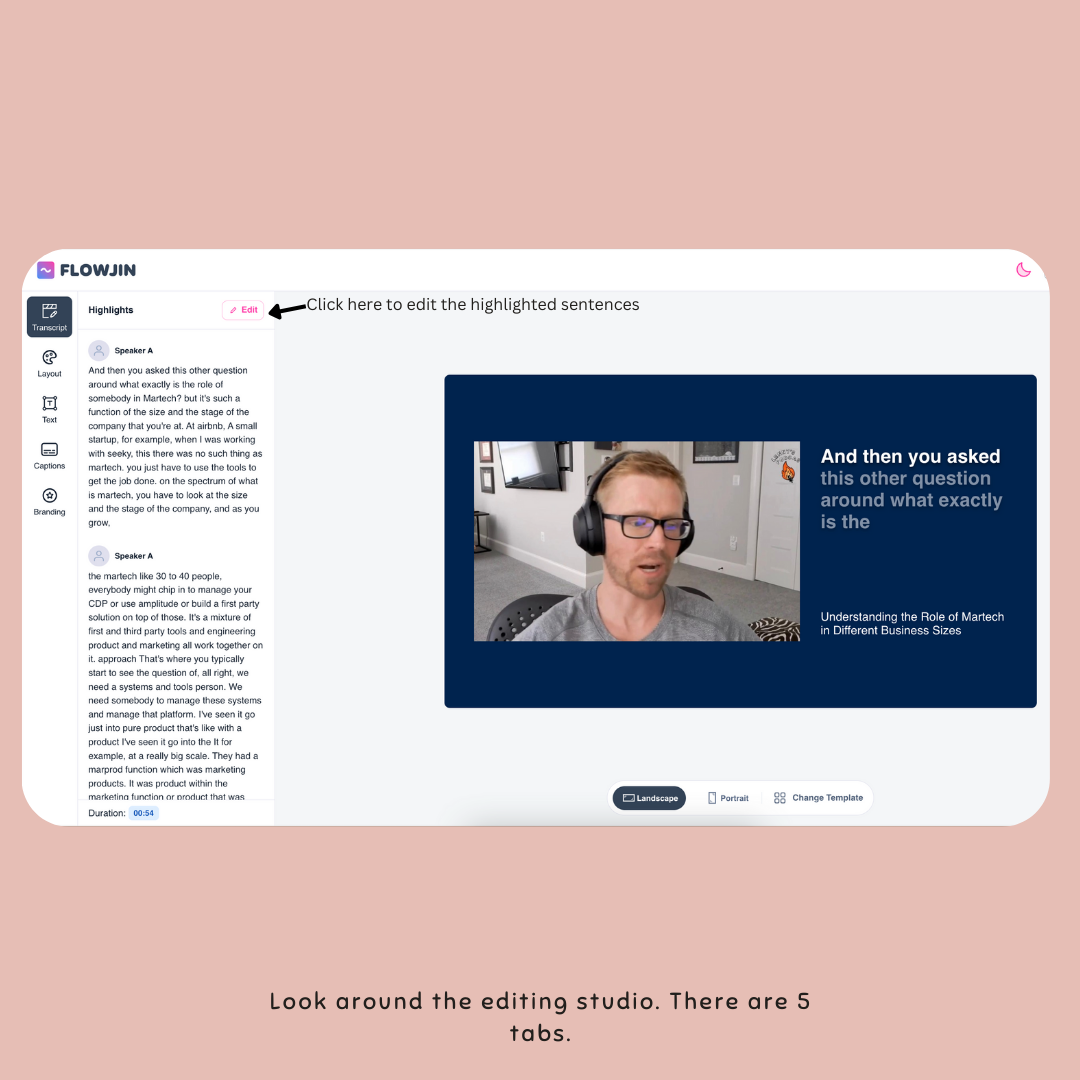
5. Enter the editing studio
To preview the highlights, you can access them by heading to the projects page, and click on “highlights” next to an analyzed upload. You will enter a page where you can see your highlights. If you click on that, you will enter our editing studio.
In the studio, we have several tabs to work with.
- Transcript: You can see the section that the AI has cut from your content. To understand what sentences the AI has highlighted within each section and to modify it, please click on the “edit” option on the upper right of the section. I’ll explain how to edit, add, or remove the highlighted sentences later.
- Settings: Here you can choose the size of your clip (vertical or horizontal), your clip template, and the colors of your clip background
- Text: Here you can edit the title that Flowjin has generated for your highlight and also edit your audio/video title.
- Caption: You can edit the style of your caption. Note that if you’d like to review the transcript of the caption, you can edit the transcript on the “transcript” tab and, the caption will change as well accordingly.
- Branding: Here you can upload a favicon or your podcast or logo for your brand to show on the clip.
6. Edit the clip content
Highlight or de-highlight
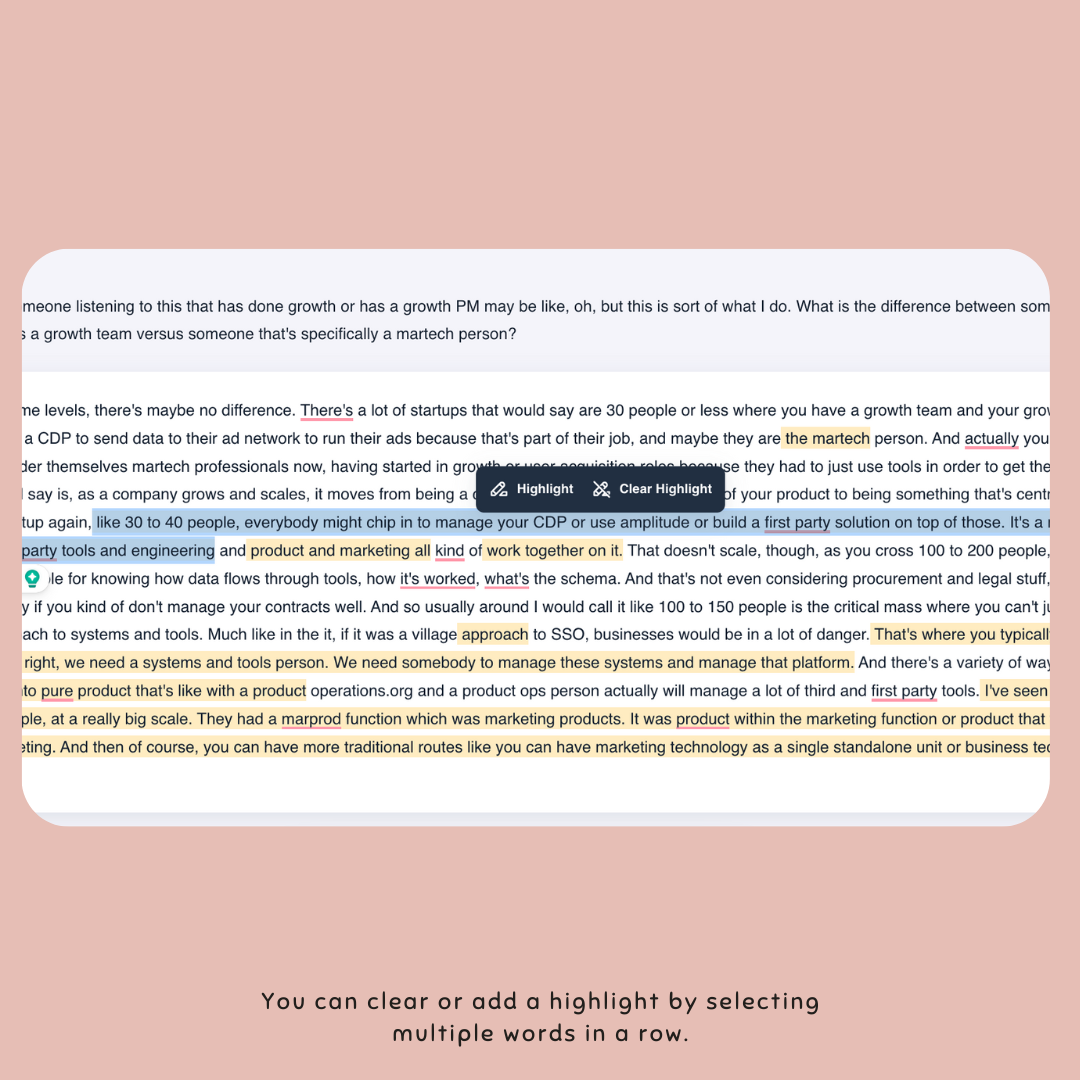
Ok, let’s go back to the “transcript” tap. If you click on edit, you will be directed to a text editor. You will see some parts and sentences are already highlighted. This is what Flowjin has found interesting or informational and the final clip will contain only the highlighted sentences (not the whole section).
You can clear a highlight by selecting the whole highlighted sentences and then select the “clear highlight” button that appears.
Also, if you like to highlight other sentences/words, all you need to do is to select the sentences/words and then click on the “highlight” option.
Expand the transcript
If you’re looking for another section of your content, you can click on “load previous part” or “load next part” and the transcript will expand accordingly.
Control the length of your clip
On the top right of the screen, you can see the length of your total clip. We have provided a guide for you for limits on the length of both vertical and horizontal clips.
Find and replace the incorrect words
There’s an option on the top menu to find a word that is transcribed incorrectly by Flowjin and replace them all with a correct word.
You can also click on “highlight less accurate words” first, to see which words were diagnosed by Flowjin with less confidence. That’s a good place to start for checking all the wrong-spelled words.
Once you are done with all the changes, click on the “save changes”.
7. Generate the clip
Now that you have finished your edits, it’s time to generate a clip. Make sure to select the right clip size, template, and review your clip title in the “text” caption before generating the clip.

That’s the end of the tutorial! We hope you save time and money using Flowjin to grow your socials!